Note: Before you create a user process in Sentinel Studio, you should have some idea of the mathematical logic behind your process. We recommend that you initially map this out using a flowchart or similar tool so that you have a guide to follow when using Sentinel Studio.
To create a new user process:
1. In Sentinel, click the Sentinel Studio button ![]() in the footer.
in the footer.
2. In Sentinel Studio, select New User Process from the File menu (File > New User Process).
The initial building blocks are displayed in the Logic Editor, consisting of two entry points (Process First and Start) and a data stream (Primary Input).
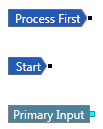
Process First: This entry point is used to process the very first data point only, unless a Reset State component is used at the end of a process, in which case the next data point processed is indicated by Process First instead of Start. In a user process, P2 Sentinel processes the first data point separately to the remaining data points, as the first data point is often used for various purposes.
Start: The user process begins at this point. Each point of data that is connected to this entry point will be processed. Unless the monitor is restarted or the state is reset, the process resumes at this point when the end is reached.
Primary Input: The main data stream that is evaluated by the user process. The source of the data is specified in the Sentinel monitor.
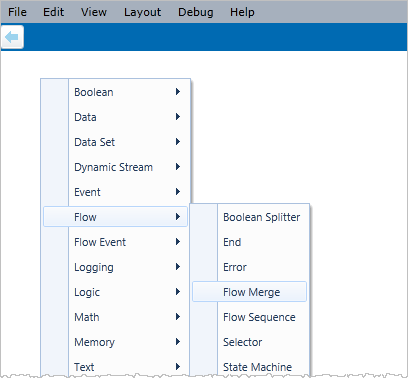
3. Right-click in the Logic Editor to add a process component.
Example: Right-click, then select Flow, then select Flow Merge
After you have added a component, you will want to connect them with other components to create the process flow.
4. To connect the components, click the first pin (e.g. Process First) and then drag it to the pin you want to connect to (e.g. Flow Merge).
Example:
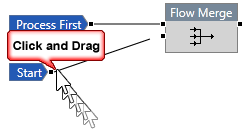
If you try to connect to an invalid pin, a red cross × appears and you will not be able to link the pins.

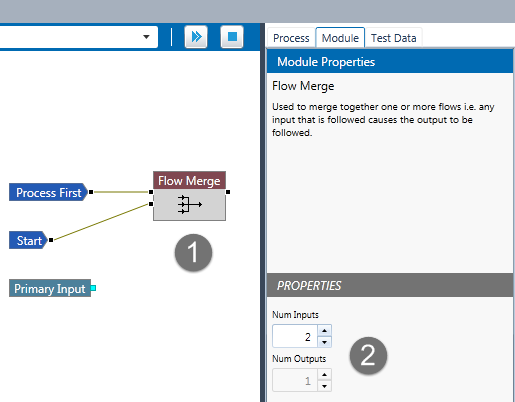
Next, you may need to adjust the properties of the component (for example, to create additional inputs and outputs); however, this is not required for every component.
5. To configure the component properties, click the component. The Module tab in the properties panel becomes active when a component is selected.
6. Complete the properties for the component.
When you add an Input or Process Parameter component to the process, these will become available in Sentinel for configuration by the user when creating a monitor that uses this process.
Every time you add one of these components, you should switch over to the UI Editor to label them and rearrange them as needed.
7. Continue adding components and linking pins until you have finished building the process.
8. Click the Process tab on the Properties pane, complete the fields, and then save the process.
Continue editing the process, saving as you go.
When you have finished building your process, you will need to validate it and then test it.
9. From the menu, click Debug > Build and Validate. Work through and resolve any errors before proceeding.
The message itself tells you what the problem is. Errors may occur if:
- Required metadata is not filled in or is filled in incorrectly.
- Sub-modules are not correctly connected, internally or externally.
- The primary input is not available to event components.
- For the window components, the Data Windowing Type property is set to None.
- A component does not have its input pin connected, if required.
- A component does not have its flow pin connected, if required.
- The data type at each end of every input and output connection for the component does not resolve down to a specific data type.
- A write memory component does not have at least one corresponding read memory component, for a particular memory key.
- A read or delete memory component does not have at least one corresponding write memory component, for a particular memory key.
- Data types of all memory components in a given memory key do not match.
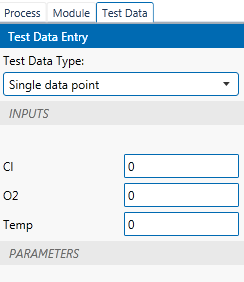
10. Click the Test Data tab of the Properties pane, and specify the data to use for testing.
All Flow Events present in a user process should be tested with a series of test cases to make sure you get the results you expect.
11. Test the process is working as expected, and that you are getting the expected results for each flow path and event.
12. Save the process (File > Save User Process).
When you are happy with your process, you can configure a Sentinel monitor to use the process. For instructions on how to configure a Sentinel monitor, refer to the P2 Sentinel User's Guide.